Introduction to Safe Unmounting
Unmounting a filesystem in Linux ensures data integrity by flushing cached writes and preventing corruption. Always perform this step before removing physical devices to avoid hardware damage or data loss.
Step-by-Step Guide to Safely Unmount Filesystems
Follow these sequential steps to unmount any mounted partition or device securely.
Step 1: Identify the Mount Point
Determine the target mount point using the mount command. Execute mount grep /dev/sdX to locate paths like /mnt/data, replacing "sdX" with your device identifier.
Step 2: Check for Active Processes
Verify no running processes use the mount point. Run lsof /path/to/mount or fuser -v /path/to/mount. If processes exist, terminate them with kill [PID] or unmount lazily.
Step 3: Execute the umount Command
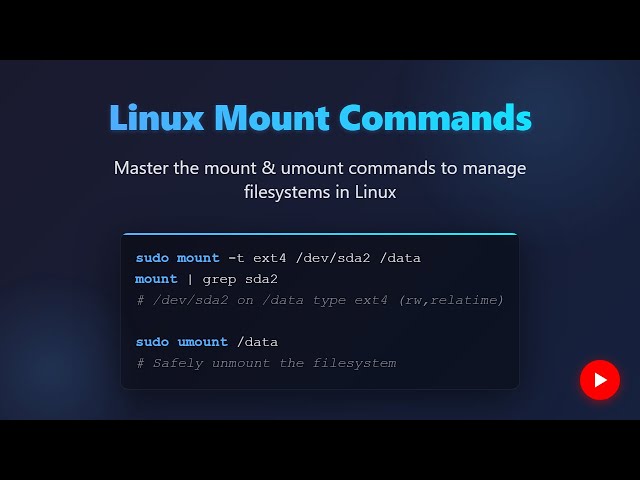
Unmount the filesystem using umount /path/to/mount. For stubborn mounts, add the lazy option with umount -l /path/to/mount to detach after processes close. Always run as root or with sudo for permissions.
Step 4: Verify Unmount Success
Confirm unmounting by re-running mount grep /path/to/mount. If no output appears, the filesystem is unmounted safely. Optionally, test device removal in GUI environments.
Step 5: Safely Remove Physical Device (If Applicable)
For external devices, physically disconnect after verifying unmount. Ensure hardware indicators show no activity. Avoid ejecting during writes to prevent errors.
Common Mistakes to Avoid
- Forcing unmount without checking processes causes file corruption.
- Skipping verification risks partial unmounts leading to errors.
- Removing non-removable internal drives without proper shutdown harms the system.