Disabling the lock screen on Windows 10 streamlines login processes, ideal for saving time and boosting efficiency. Here are the most reliable methods:
Using Group Policy Editor
This applies to Windows 10 Pro, Enterprise, or Education editions and fully disables the lock screen:
- Press Win + R, type , and hit Enter.
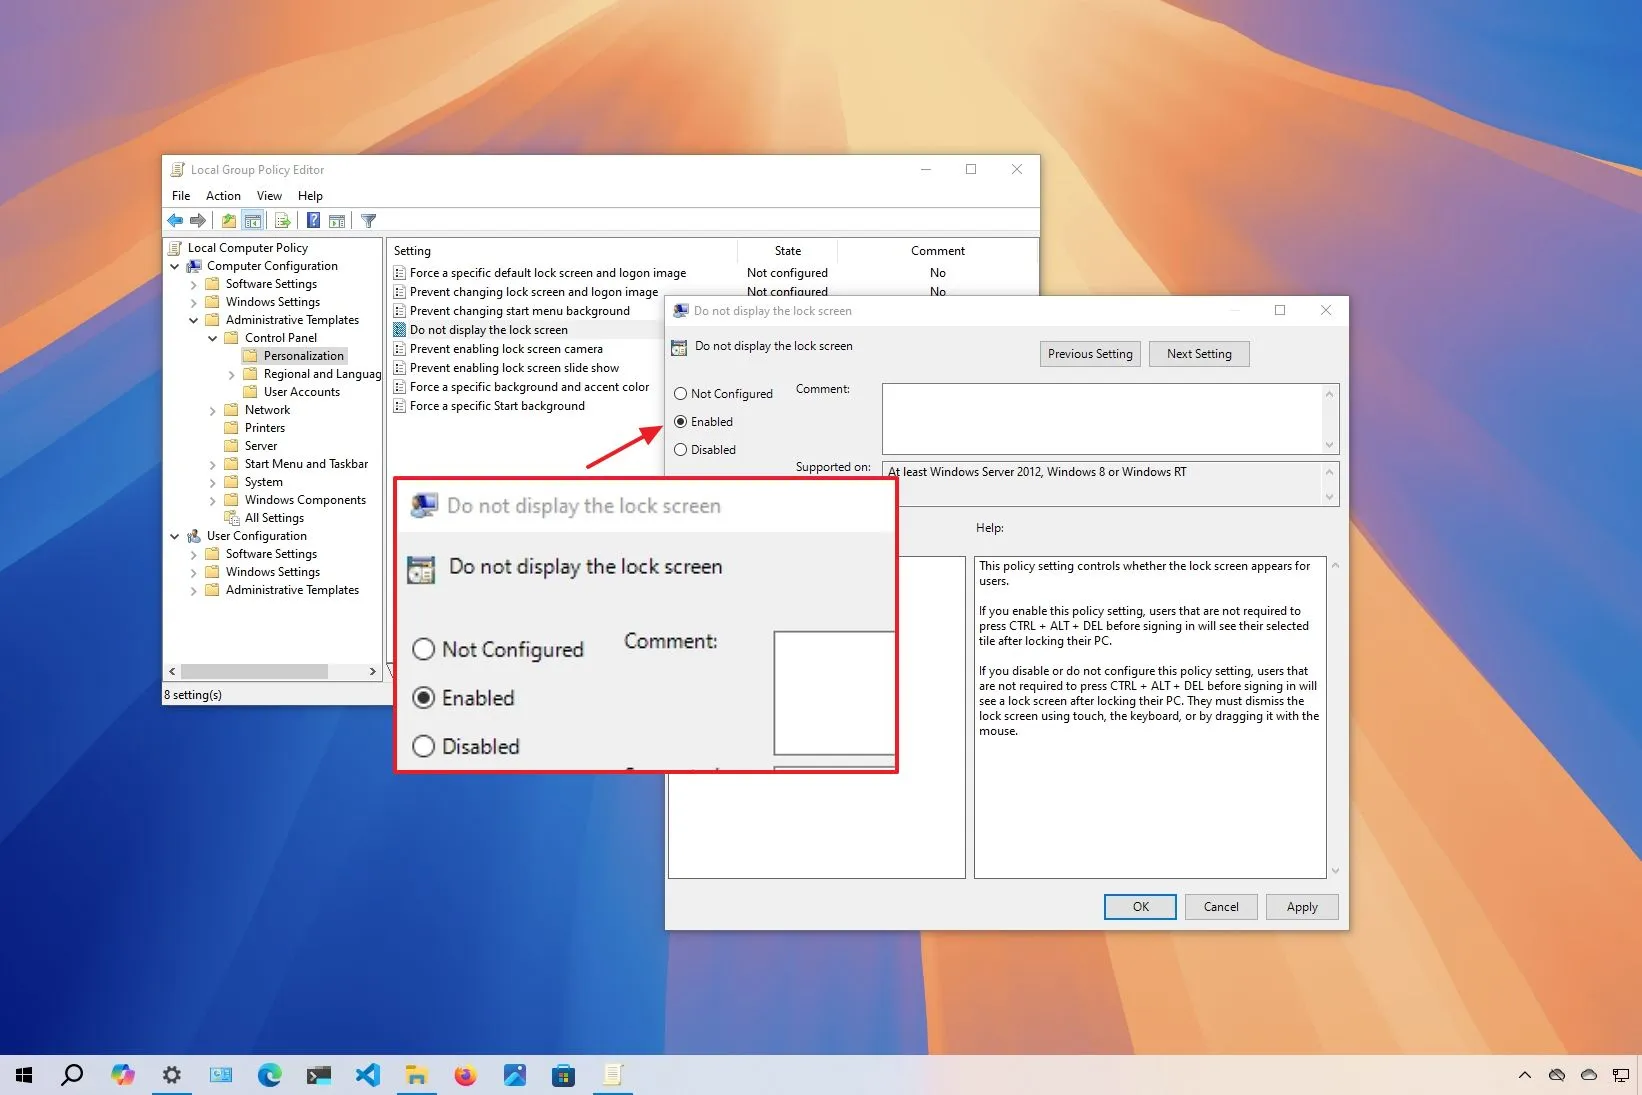
- Navigate to Computer Configuration > Administrative Templates > Control Panel > Personalization.
- Double-click on "Do not display the lock screen" and set it to Enabled.
- Click Apply, then OK, and restart your PC to apply changes.
Using Registry Editor
For all Windows 10 versions, this method achieves similar results but requires caution:
- Press Win + R, type regedit, and press Enter; confirm UAC prompt if prompted.
- Navigate to HKEY_LOCAL_MACHINESOFTWAREPoliciesMicrosoftWindowsPersonalization.
- Right-click in the right pane, select New > DWORD (32-bit) Value, and name it NoLockScreen.
- Double-click the new value, set its data to 1, and click OK.
- Restart your computer to enforce the lock screen disable.
Optimizing via Settings
For a simplified approach that minimizes lock screen interference without full disable:
- Open Settings from the Start menu and go to Personalization > Lock screen.
- Turn off "Show lock screen background picture on the sign-in screen" toggle.
- While this doesn't eliminate the screen completely, it reduces visual clutter and speeds up access.
Note: Test each method for compatibility, and ensure backups are created before registry edits to prevent system issues. Always apply changes on an admin account for effectiveness.