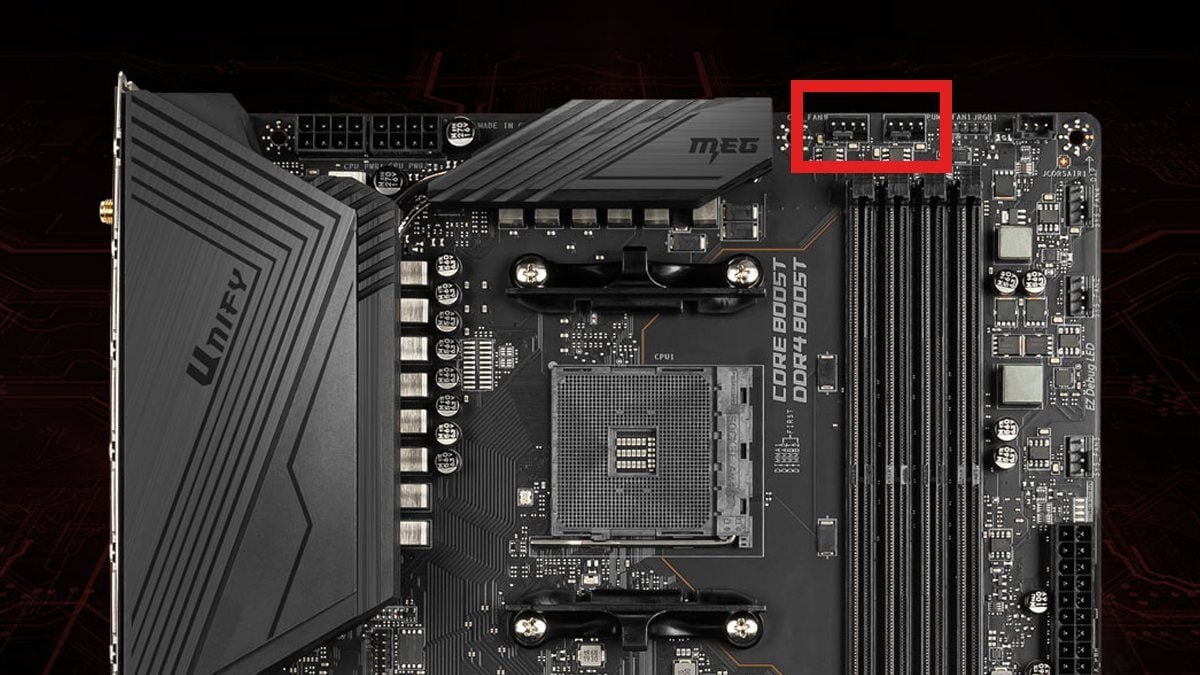
The CPU_opt header is an auxiliary fan connector found on modern motherboards, designed specifically for controlling additional CPU or system fans using PWM or DC mode. Properly configuring it optimizes cooling performance while minimizing noise. Follow these steps for effective control.
Understanding CPU_opt Header
CPU_opt supports Pulse Width Modulation (PWM) for precise speed adjustments and voltage-based control. Unlike the CPU_fan header, it often allows independent fan curves tailored to secondary cooling components. This flexibility prevents overheating and reduces unnecessary fan noise during low loads.
Accessing and Configuring Settings
Reboot your system and enter BIOS or UEFI firmware. Navigate to the hardware monitoring or fan control section. Locate the CPU_opt header settings—typically listed alongside other fan headers. Follow this sequence:

- Select PWM or DC mode based on your fan specifications.
- Set a custom fan curve using temperature inputs.
- Test configurations under idle and load conditions for stability.
Best Practices for Proper Control
Ensure safe operation by adhering to these guidelines:
- Match fan specifications with motherboard voltage limits.
- Regularly monitor temperatures via software tools to validate settings.
- Adjust curves gradually to avoid abrupt speed changes that strain components.
Properly leveraging CPU_opt enhances system longevity and efficiency without overwhelming acoustic outputs.


