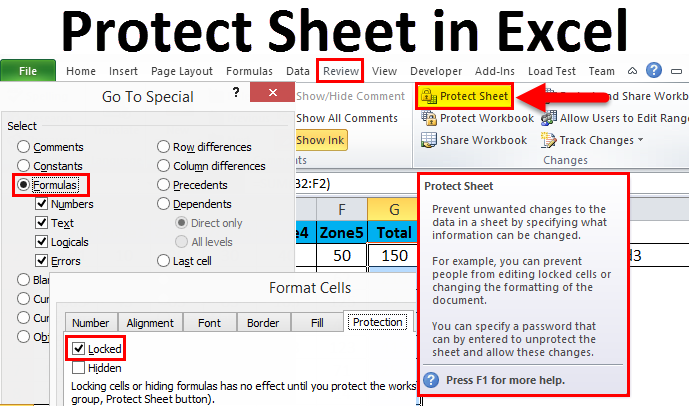
Protecting worksheets prevents unauthorized editing while permitting data viewing. Follow these steps to secure your Excel sheets:
Step 1: Select Target Worksheet
Click the specific worksheet tab you intend to lock at the bottom of your Excel window.
Step 2: Access Protection Settings
Navigate to the Review tab on the ribbon. Select Protect Sheet in the Changes group.
Step 3: Configure Permissions
In the dialog box:
- Check Select locked cells and Select unlocked cells to allow navigation
- Enable additional actions like sorting or formatting as needed
- Deselect permissions requiring restriction (e.g., editing cells)
Step 4: Set Password
Enter a password in the text field. Use uppercase, lowercase, numbers, and symbols for enhanced security.
Step 5: Confirm and Activate
Re-enter your password when prompted and click OK. The worksheet now displays a padlock icon indicating protection.
Critical Considerations
- Password recovery is impossible if forgotten - store it securely
- Unlock via Review > Unprotect Sheet before modifying locked elements
- Worksheet protection doesn't encrypt files - use file-level encryption for sensitive data