Creating curved text in PowerPoint enhances visual hierarchy and design appeal. These five methods deliver professional results without external tools.
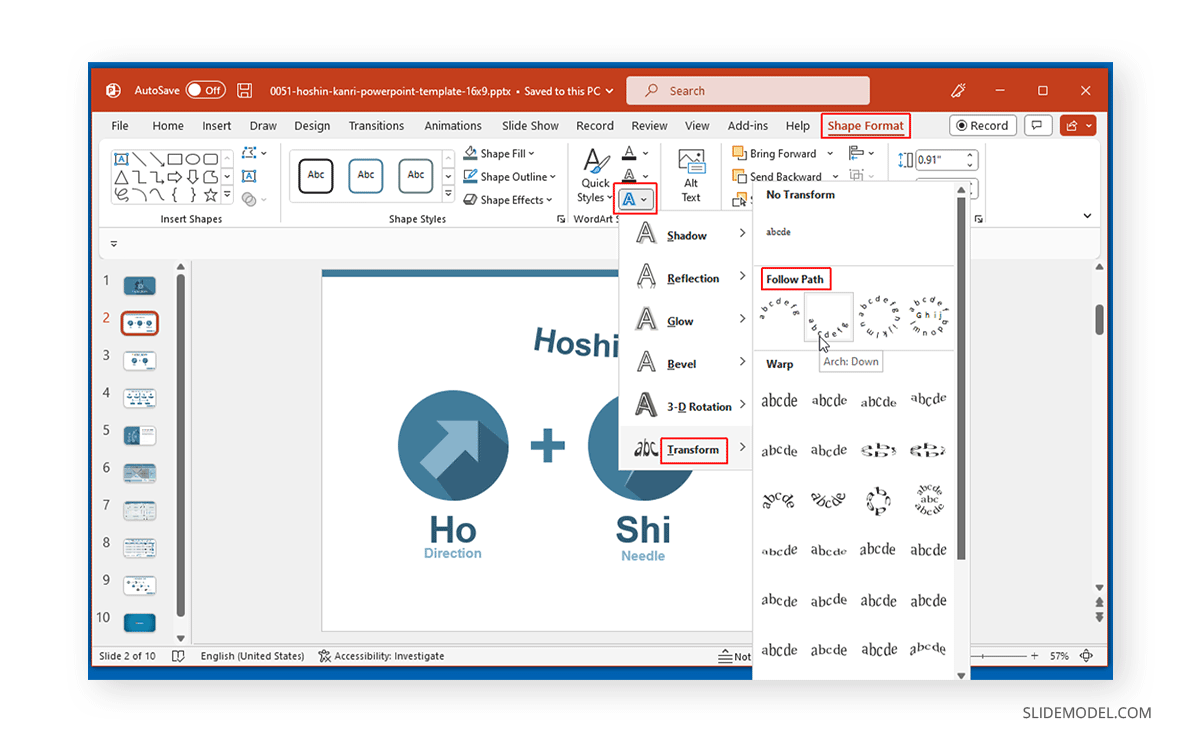
Method 1: Use Transform Text Effect
Select your text box. Navigate to the Shape Format tab. Click Text Effects > Transform. Choose an arc style (Follow Path section) like Arch Up or Circle. Manually adjust curvature by dragging the yellow diamond handle on the text box. Modify font size, spacing, and text box dimensions for optimal fit.
Method 2: Place Text Along a Curve Shape
Insert a curve or arc shape using Insert > Shapes (e.g., Curve or Arc). Draw your desired curve on the slide. Right-click the shape and select Add Text. Type your text—it will follow the curve’s path. Delete the shape's outline via Shape Format > Shape Outline > No Outline.
Method 3: Utilize WordArt Styles
Go to Insert > WordArt and select a style. Enter your text. With the WordArt selected, go to Shape Format > Text Effects > Transform. Apply a curved path effect (Arch Up, Arch Down, etc.). Use the yellow diamond handle for fine-tuning.
Method 4: Convert Text to Curved Shape
Write your text in a text box. Select it. Press Ctrl + X to cut. Go to Home > Paste dropdown > Paste Special > Choose Picture (Enhanced Metafile). Right-click the pasted image and select Group > Ungroup (confirm conversion to Microsoft Office drawing objects). Ungroup again to edit individual letters. Apply curve effects or rotate each letter manually.
Method 5: Manual Adjustment
Use separate text boxes for each word or letter. Position them along an imaginary arc:
- Arrange text boxes in a curved path.
- Select a box, navigate to Shape Format > Rotate.
- Apply incremental rotation to each box for precise curvature control.
- Align meticulously using Align tools (distribute vertically/horizontally).
This method offers maximum customization for complex arcs.

Key Tip: Ensure adequate font size and weight for legibility. Subtle curvature often works best. Test readability from typical viewing distances.