Converting Direct-Attached Storage (DAS) to Network-Attached Storage (NAS) centralizes data access, enhances scalability, and improves manageability. Follow these efficient steps for a swift transition:
Core Differences & Conversion Approach
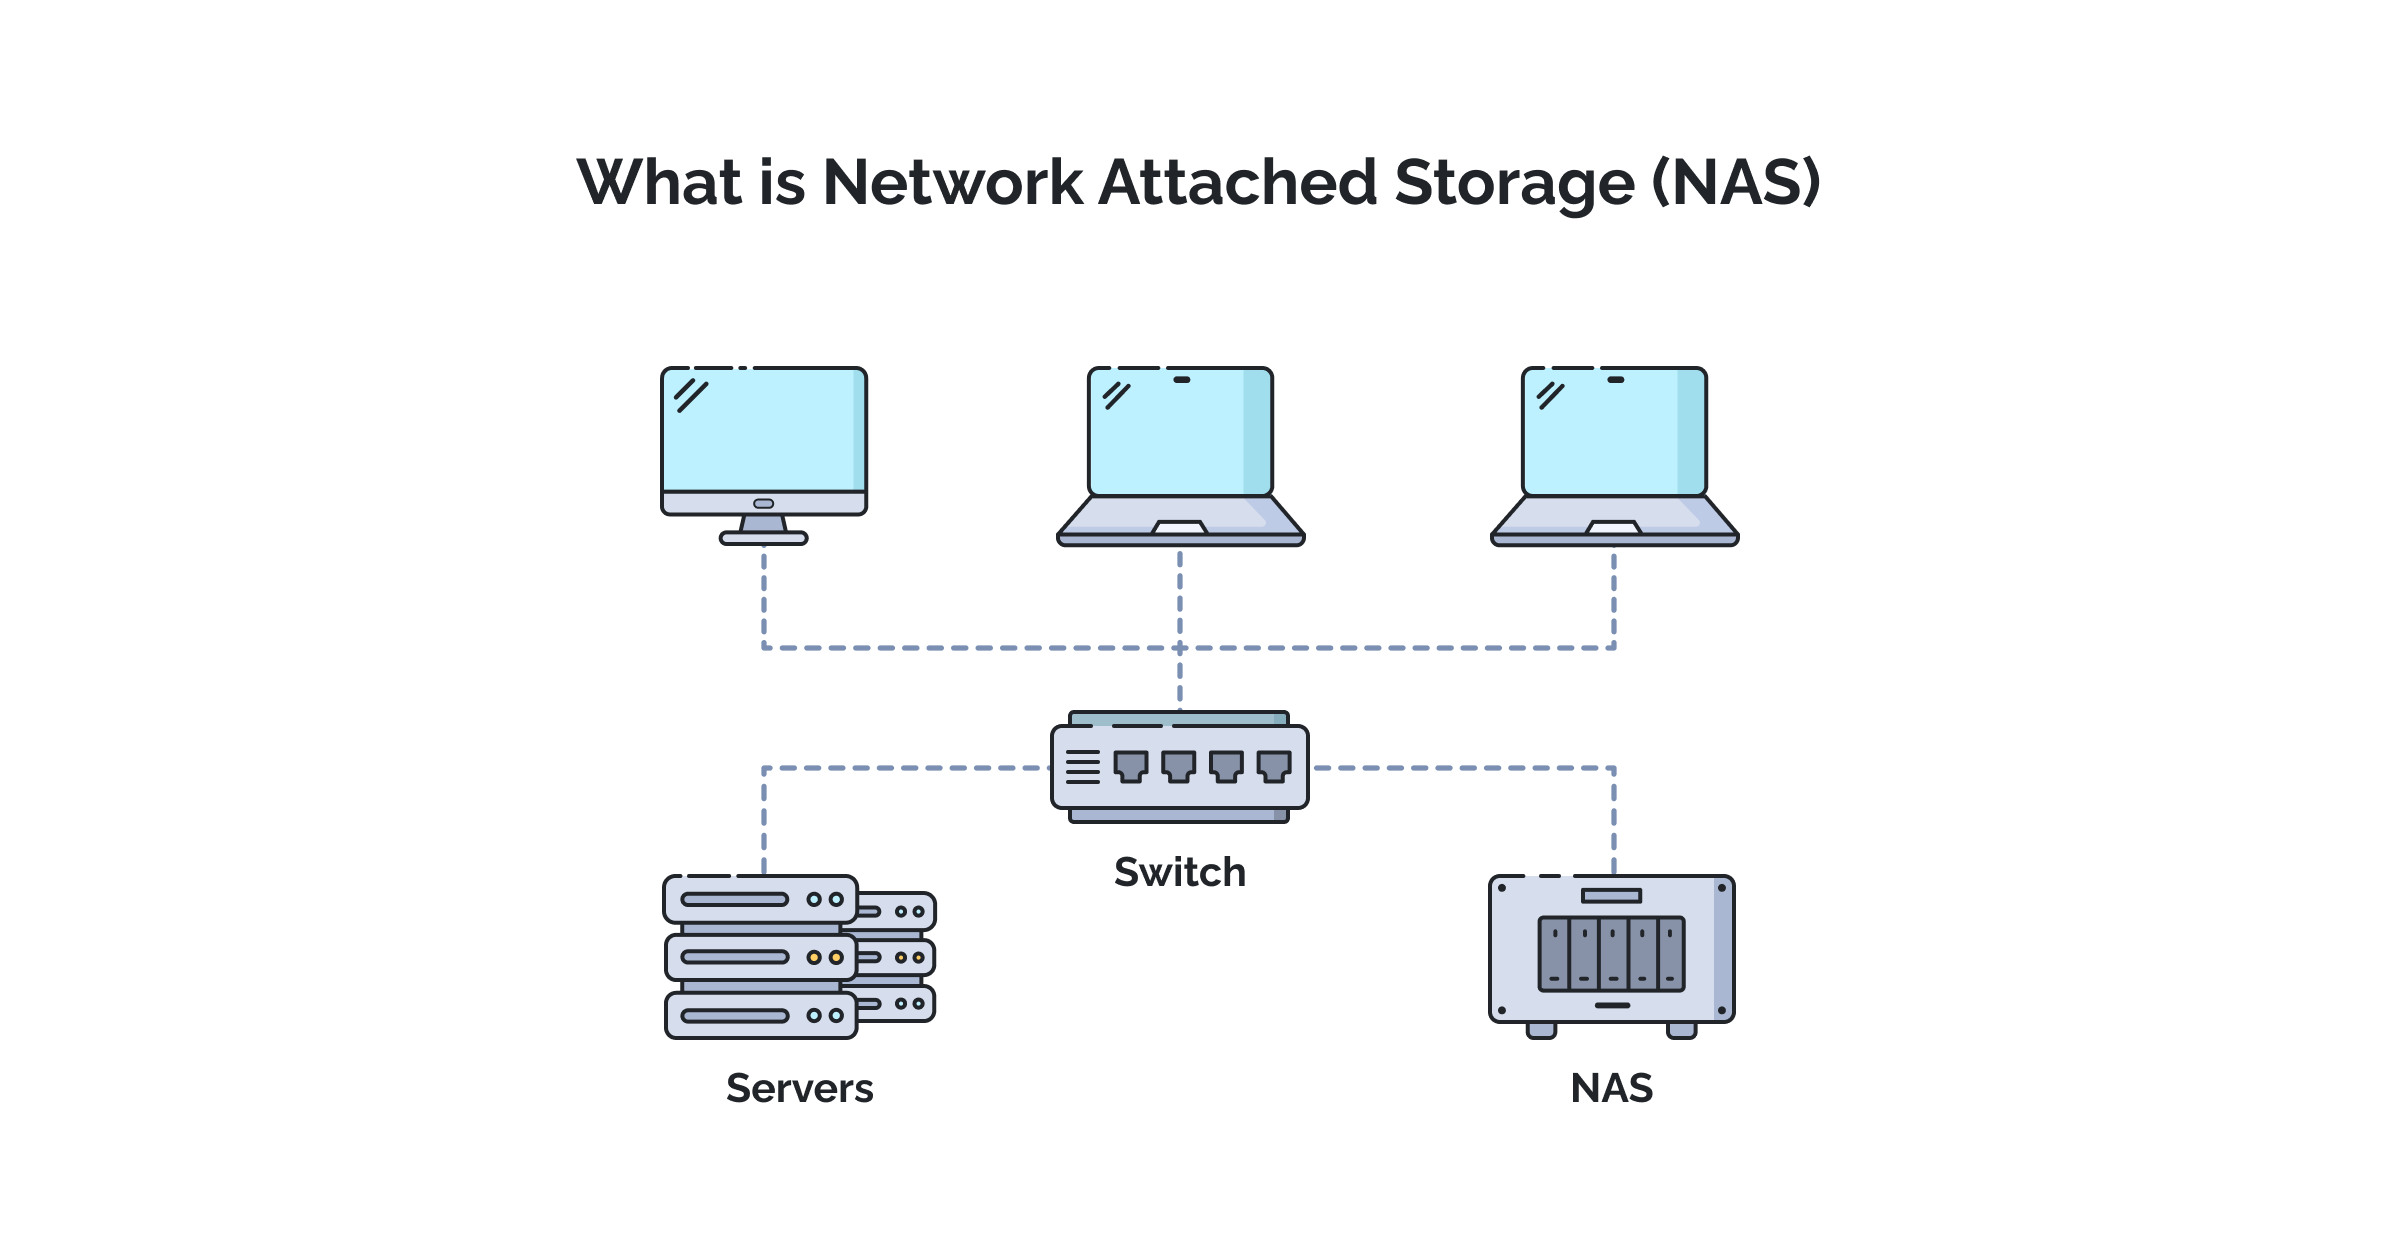
DAS connects directly to a single server (e.g., via SAS, SATA). NAS connects via Ethernet (usually TCP/IP), presenting storage over a network using protocols like SMB/CIFS or NFS. Conversion involves presenting existing DAS storage blocks as files through NAS protocols.
Pre-Migration Preparation
1. Assess Hardware & Software:
- Verify the DAS device's capacity, health, and RAID status.
- Ensure the target NAS appliance supports the required network protocols and has sufficient capacity.
- Confirm network infrastructure readiness (gigabit+ Ethernet, adequate switches).
2. Preserve Data:
- Implement a comprehensive, verified backup of all DAS data. Absolute non-negotiable.
- Identify active users/applications accessing the DAS; plan downtime or staged migration.
3. Plan NAS Configuration:
- Determine network shares/folders, naming conventions, access permissions (AD/LDAP integration).
- Select target file system (e.g., ZFS, Btrfs, ext4).
Fast Migration Process
1. Repurpose Storage (If Applicable):
- For external DAS enclosures: Physically disconnect drives/enclosure from the existing host server.
- Connect the DAS enclosure's drives directly to the NAS appliance's internal controllers or external ports if compatible and the NAS allows JBOD (Just a Bunch of Disks) import. Skip if using new disks.
2. Prepare NAS Storage:
- Create required Volumes/Pools on the NAS using the available drives (imported JBOD or new disks).
- Set up File Systems on these volumes.
- Establish top-level Network Shares (SMB/NFS) with appropriate permissions.
3. Direct Data Migration
- Mount the newly created NAS share(s) on the original DAS-attached server or a dedicated migration host.
- Mount the original DAS storage locally on that server/host.
- Use high-speed copy tools (e.g., `robocopy /MIR /MT:32` for Windows, `rsync -avh --progress --partial` for Linux) to transfer data from DAS mount points to the mounted NAS share(s).
- Ensure file permissions and attributes are preserved during the copy. Utilize parallel transfers if supported by your tooling.
4. Reconfigure Client Access
- Update client systems and applications: Map new NAS shares/drives (e.g., via drive letters or mount points). Replace direct DAS paths with NAS UNC paths (NAS_ServerShare) in applications/scripts.
- Configure applications for concurrent/multi-user access if applicable.
5. Validate & Finalize
- Verify data integrity: File counts, sizes, critical checksums. Spot-check functionality.
- Test permissions rigorously for all user groups.
- Decommission original DAS mounts/paths on the host server. Repurpose or erase DAS disks securely.
Optimizing for Speed
Network: Use 10GbE or higher links between migration hosts/switches/NAS. Dedicate isolated network segment if possible.
Tooling: Utilize multi-threaded copy utilities.
Parallelism: Pre-stage shares/migration paths to allow parallel transfers of different datasets.
Window: Schedule bulk migration during planned downtime.
Critical Considerations
Migration is inherently high-risk. Backup first. Test protocols/permissions thoroughly. Plan for access downtime or service interruptions during the switchover phase. Performance will differ (latency over network vs. direct-attach).