Monitoring CPU temperature in Windows 11 is essential for system stability and preventing thermal throttling. Below are two reliable methods using free third-party tools.
Method 1: Using Core Temp
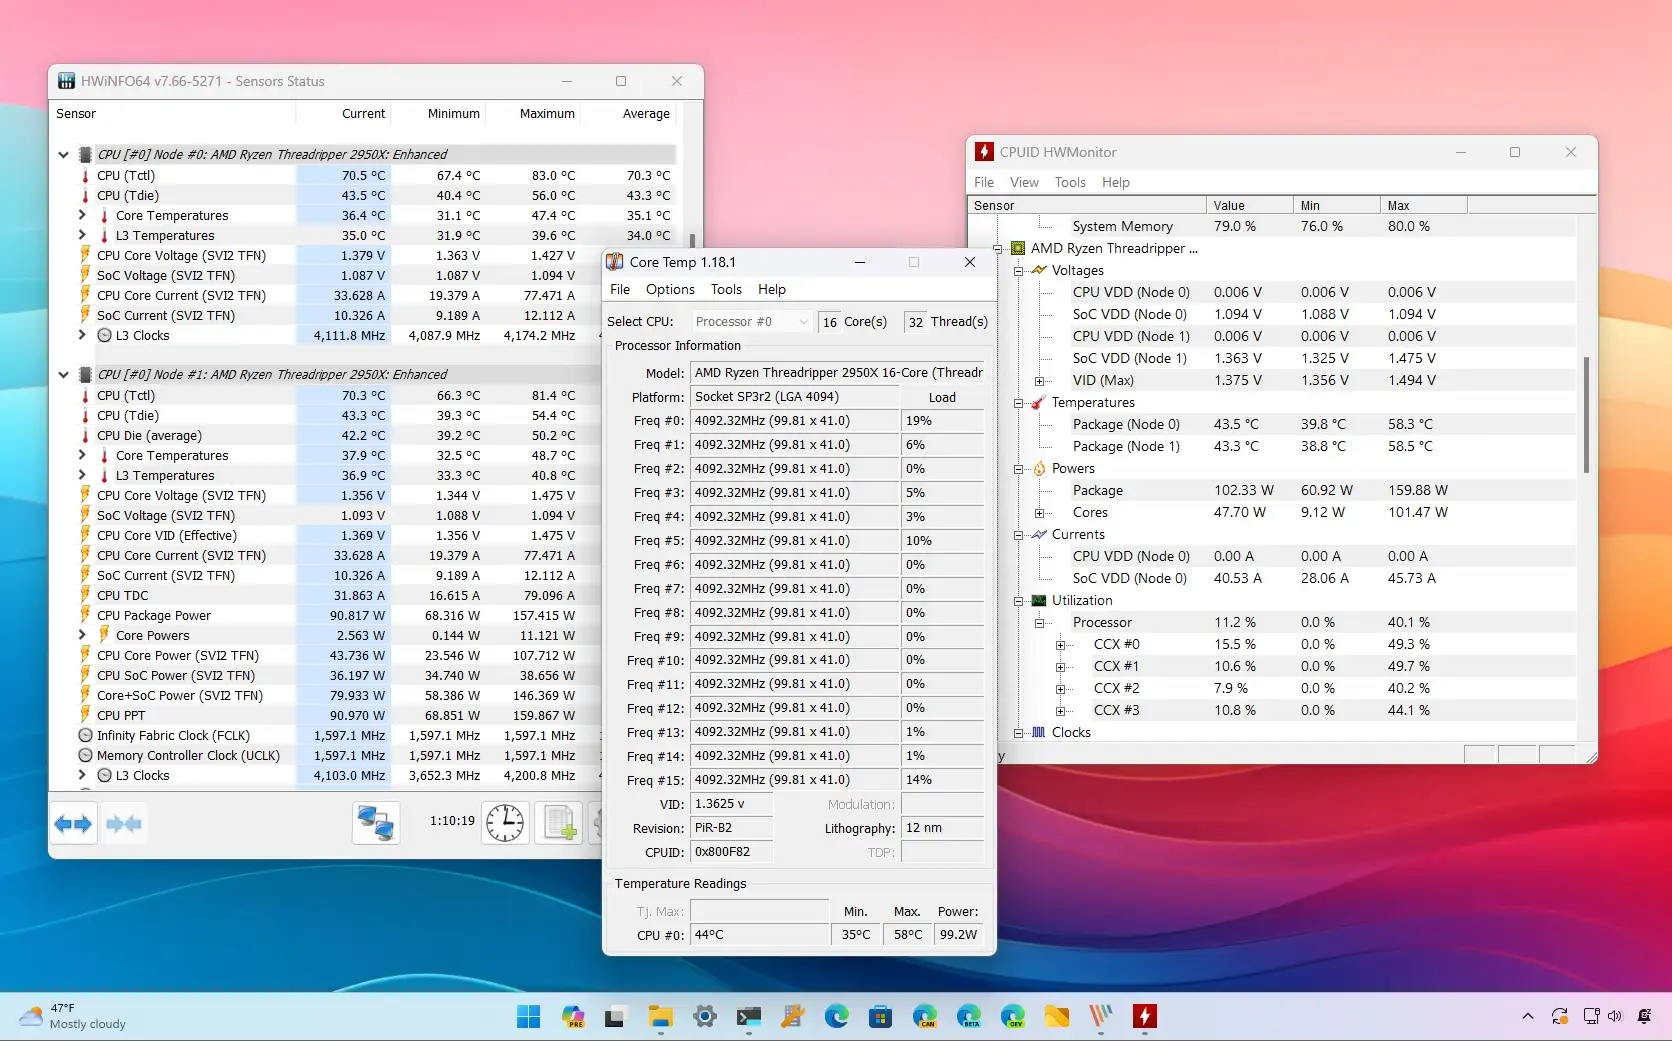
Core Temp provides real-time temperature readings per CPU core without background processes.
Steps:
- Download Core Temp from its official repository.
- Run the installer and accept the license agreement.
- Deselect optional software during installation.
- Launch Core Temp post-installation.
- Observe temperatures under each core labeled "Core #" in the interface.
Method 2: Using HWMonitor
HWMonitor offers comprehensive monitoring of temperatures, voltages, and fan speeds.
Steps:
- Download the portable ZIP version from the developer’s site.
- Extract the ZIP file to your preferred directory.
- Execute the HWMonitor executable.
- Expand the CPU section (e.g., "Intel Core" or "AMD") in the sensor tree.
- Check values labeled "Core Temperature," "Package Temperature," or "Tdie."
Critical Notes:
- Install only from verified sources to avoid bundled malware.
- Idle temperatures typically range 30°C-50°C; under load 60°C-85°C varies by CPU model.
- Sustained temperatures exceeding 95°C indicate cooling issues requiring immediate attention.
- For benchmarking, monitor temperatures during stress tests using tools like Prime95 or Cinebench.