Enabling Wi-Fi calling on Android varies slightly by manufacturer, but follows a consistent process across models. Before proceeding, ensure your carrier supports this feature and that you're in a supported region.
Universal Setup Process
Follow these steps regardless of phone model:
- Connect to Wi-Fi and ensure cellular signal is available during setup
- Open your Settings app
- Navigate to Connections or Network & Internet
- Select Mobile Networks or SIM settings
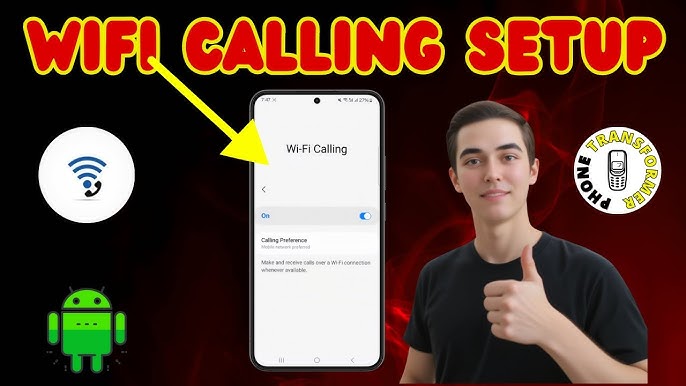
- Tap Wi-Fi Calling or Advanced Calling
- Toggle the switch to On position
- Complete emergency address registration when prompted
Manufacturer-Specific Variations
- Samsung: Settings → Connections → Wi-Fi Calling
- Google Pixel: Settings → Network & Internet → Calls & SMS → Wi-Fi Calling
- OnePlus: Settings → Wi-Fi & Network → SIM & Network → Wi-Fi Calling
- Xiaomi: Settings → SIM cards & mobile networks → Advanced → Wi-Fi Calling
Verification & Troubleshooting
- Look for Wi-Fi Calling or WiFi icon in status bar
- Test functionality by enabling Airplane Mode then turning Wi-Fi back on
- If missing options, contact carrier to enable feature on your account
- Ensure device runs latest OS version via Settings → System Updates
- Restart device after initial activation
Wi-Fi calling automatically routes calls/texts through available Wi-Fi networks when cellular signal is weak. Your emergency address remains accessible to carriers regardless of connection mode.