Upgrading to a 4TB SSD enhances storage capacity and system speed. Ensure your PC supports SATA or NVMe interfaces, and always back up data beforehand. Gather tools like a Phillips screwdriver and antistatic wrist strap.
Preparation
Power down the computer and unplug it from the outlet. Discharge static electricity by touching a metal surface. Confirm the SSD fits your motherboard or case slots (e.g., 2.5-inch bay or M.2 slot).
Step-by-Step Installation
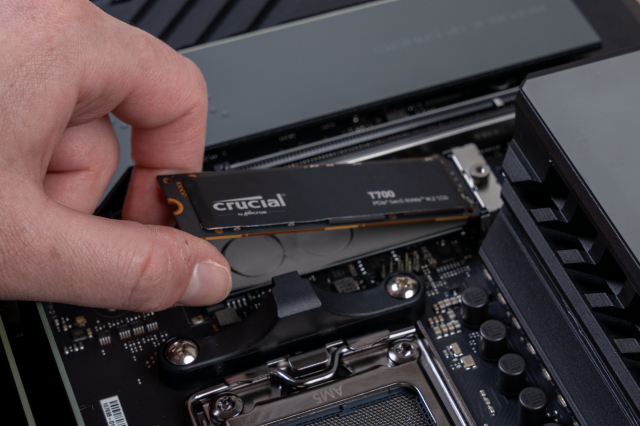
Open the PC case using screws or latches. Locate an empty drive bay or M.2 slot. Install the SSD securely:
- For 2.5-inch SATA SSD: Mount it with screws in the bay, connect a SATA data cable to the motherboard, and attach a SATA power cable from the PSU.
- For M.2 NVMe SSD: Insert it diagonally into the M.2 slot on the motherboard, then secure it with the mounting screw.
Double-check connections are snug to avoid loose cables.
Post-Installation Setup
Reattach the case and plug the PC back in. Power on the system. Access BIOS/UEFI by pressing the designated key (e.g., DEL or F2) during boot to ensure the SSD is detected. In the operating system, initialize the SSD:
- On Windows, open Disk Management, format the drive as NTFS, and assign a drive letter.
- On macOS, use Disk Utility to erase and format the SSD.
Verify functionality by transferring test files. Optimize performance by enabling TRIM support in settings.