Understanding Android System Intel (Virtualization Technology)
Android System Intel typically refers to the utilization of Intel's hardware-assisted virtualization technologies, such as Intel VT-x (Virtualization Technology for x86) and sometimes Intel VT-d (for Directed I/O), within the Android ecosystem. This technology allows a single physical processor to act like multiple processors, enabling efficient and secure concurrent execution of multiple operating systems or isolated environments on an Android device.
Key Features
- Hardware Acceleration: Provides direct hardware support for virtualization tasks, significantly improving performance over pure software-based solutions.
- Enhanced Security: Enables hardware-enforced isolation between virtual environments (e.g., Android OS and guest OS/containers), protecting the host system and data.
- Improved App Compatibility: Essential for running apps or operating systems that require virtualization, such as certain emulators (e.g., advanced Android Emulator configurations, Windows-on-ARM emulation).
- NDK Development Support: Facilitates advanced native development and debugging within virtualized environments using tools like the Android Native Development Kit (NDK).
- Efficient Resource Utilization: Allows multiple isolated workloads to share underlying hardware resources more effectively.
How to Enable Intel Virtualization (VT-x/VT-d)
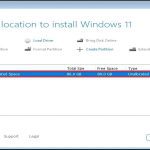
Enabling virtualization extensions like Intel VT-x/VT-d must be done in your device's firmware (BIOS/UEFI). Android itself doesn't provide a toggle within the OS settings. Important: Enabling VT requires administrator access and rebooting your device.
- Reboot into BIOS/UEFI: Restart your device. Immediately upon restart, repeatedly press the designated key to enter Setup (Common keys: F2, F10, F12, Del, Esc - specific key varies by manufacturer/model).
- Navigate to Advanced Settings: Once in the BIOS/UEFI interface, use the arrow keys to navigate to the 'Advanced', 'CPU Configuration', 'Chipset', or similarly named section.
- Locate Virtualization Options: Look for settings labeled:
- 'Intel Virtualization Technology' (Intel VT-x)
- 'VT-x'
- 'Intel VT-d' (if your CPU/chipset supports it)
- 'Virtualization Technology'
Options might be nested under 'Security Features' on some devices.
- Enable the Feature(s): Select the desired virtualization technology setting(s) and change its state from 'Disabled' to 'Enabled'.
- Save and Exit: Navigate to the 'Exit' menu. Select the option to 'Save Changes and Exit' or similar. Confirm saving settings.
- Boot Back Into Android: Your device will restart normally and boot back into the Android operating system.

Verifying Virtualization is Active
While Android doesn't have a standard setting, tools exist to check:
- Terminal Apps (Requires Root): Install a terminal emulator. Run: grep -E 'vmxsvm' /proc/cpuinfo. Seeing output like 'vmx' confirms VT-x is present (though not guarantee it's usable by Android itself if disabled elsewhere).
- Dedicated System Info Apps: Utilize reputable system information tools. They often report CPU features, including VT capabilities and status.
- Test Software: Attempt to run software known to require hardware virtualization (like specific virtual machine apps). Failure might indicate VT is still disabled or unavailable.
Important Considerations
- Hardware Support Mandatory: Your device's CPU must physically support Intel VT-x/VT-d. Some low-power or older CPUs may lack this feature.
- BIOS/UEFI Limitations: The option might not exist in your firmware, even on compatible hardware, due to manufacturer restrictions.
- Security Implications: While generally safe, enabling VT slightly enlarges the device's potential attack surface. Weigh benefits against risks.
- OEM Lockouts: Some manufacturers permanently lock VT on consumer devices. Refer to device-specific documentation.
- Hypervisor Conflicts: Some security software or Android features (like certain 'Defense' modes) may rely on or conflict with enabled VT.