Adding fast WiFi to a desktop PC is straightforward. Here are the most effective methods:
Adding WiFi: Your Options
- Internal PCIe WiFi Card: The best performance solution.
- USB WiFi Adapter: The simplest plug-and-play solution.
- Motherboard with Built-in WiFi: If pre-installed or upgrading your motherboard.
- Ethernet over Powerline (with WiFi): Use electrical wiring, often providing WiFi at the adapter.
Step-by-Step: Installing a PCIe Card
1. Choose the Right Card: Ensure compatibility with your motherboard and WiFi standards.
2. Shut Down & Open Case: Power off, unplug, ground yourself.
3. Locate PCIe Slot: Identify an available slot and remove the corresponding backplate.
4. Install the Card: Align and firmly seat the card into the slot. Screw the bracket to the case.
5. Connect Antennas: Attach the antennas to the card's ports on the back bracket.
Step-by-Step: Using a USB Adapter
1. Choose the Right Adapter: Prioritize modern standards for speed.
2. Plug In: Insert directly into a USB port.

3. Install Drivers: Most install automatically. Use provided software or download from the official website for latest versions if needed.
4. Connect: Select your network and enter the password.
Optimizing Desktop WiFi Speed
- Position Your Antennas: Keep internal card or USB adapter antennas clear of obstructions and the PC case. Adjust angles for best signal.
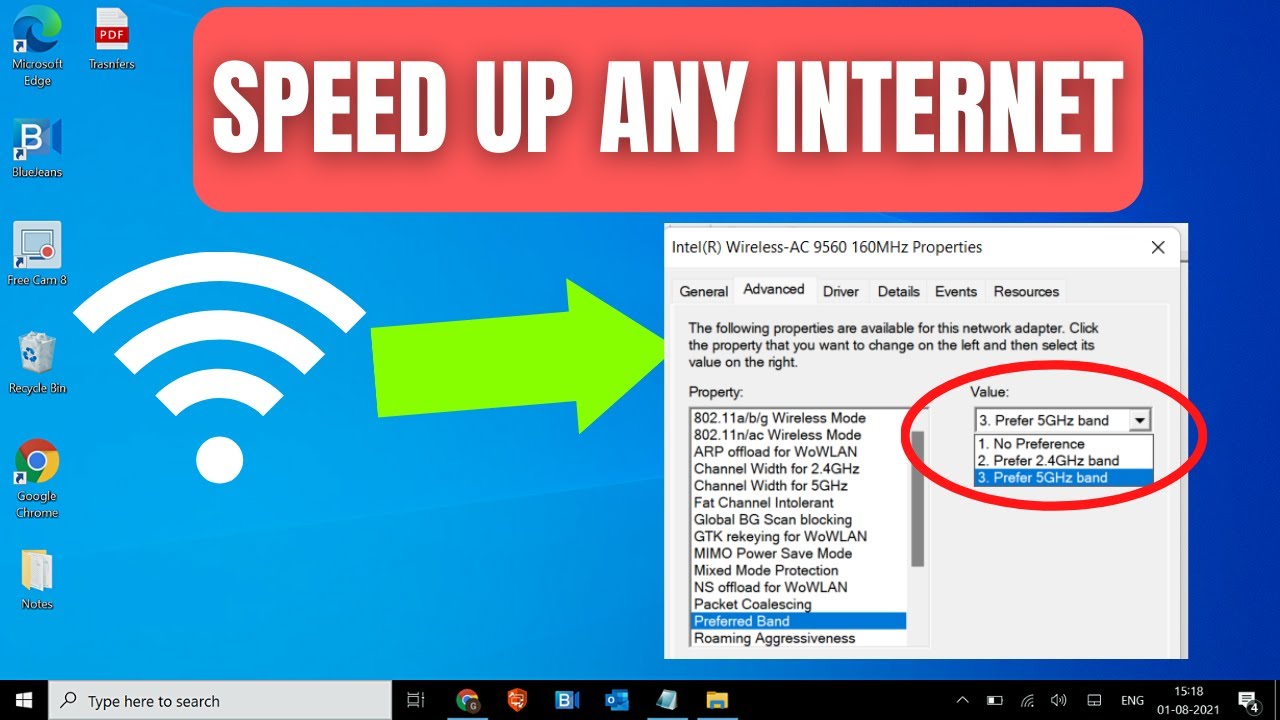
- Use 5GHz Band: If your router and adapter support it, connect to the 5GHz network for less interference and higher speeds (over shorter distances).
- Update Drivers: Always install the latest WiFi drivers.
- Consider Router Placement: Position your router centrally and elevated. Minimize physical barriers.
- Check Router Settings: Ensure modern standards are enabled. Try different WiFi channels if experiencing interference.
When Possible: Use Ethernet
For maximum speed, stability, and lowest latency, a wired Ethernet connection is always superior to WiFi.