To insert a clickable checkbox in Microsoft Word, follow these steps:
Using the Developer Tab (Interactive Checkbox)
Step 1: Show the Developer Tab
- Go to File > Options > Customize Ribbon.
- Under "Customize the Ribbon", select "Main Tabs" in the dropdown.
- Check the box next to "Developer". Click OK.
Step 2: Insert the Checkbox
- Place your cursor where you want the checkbox.
- Go to the Developer tab in the ribbon.
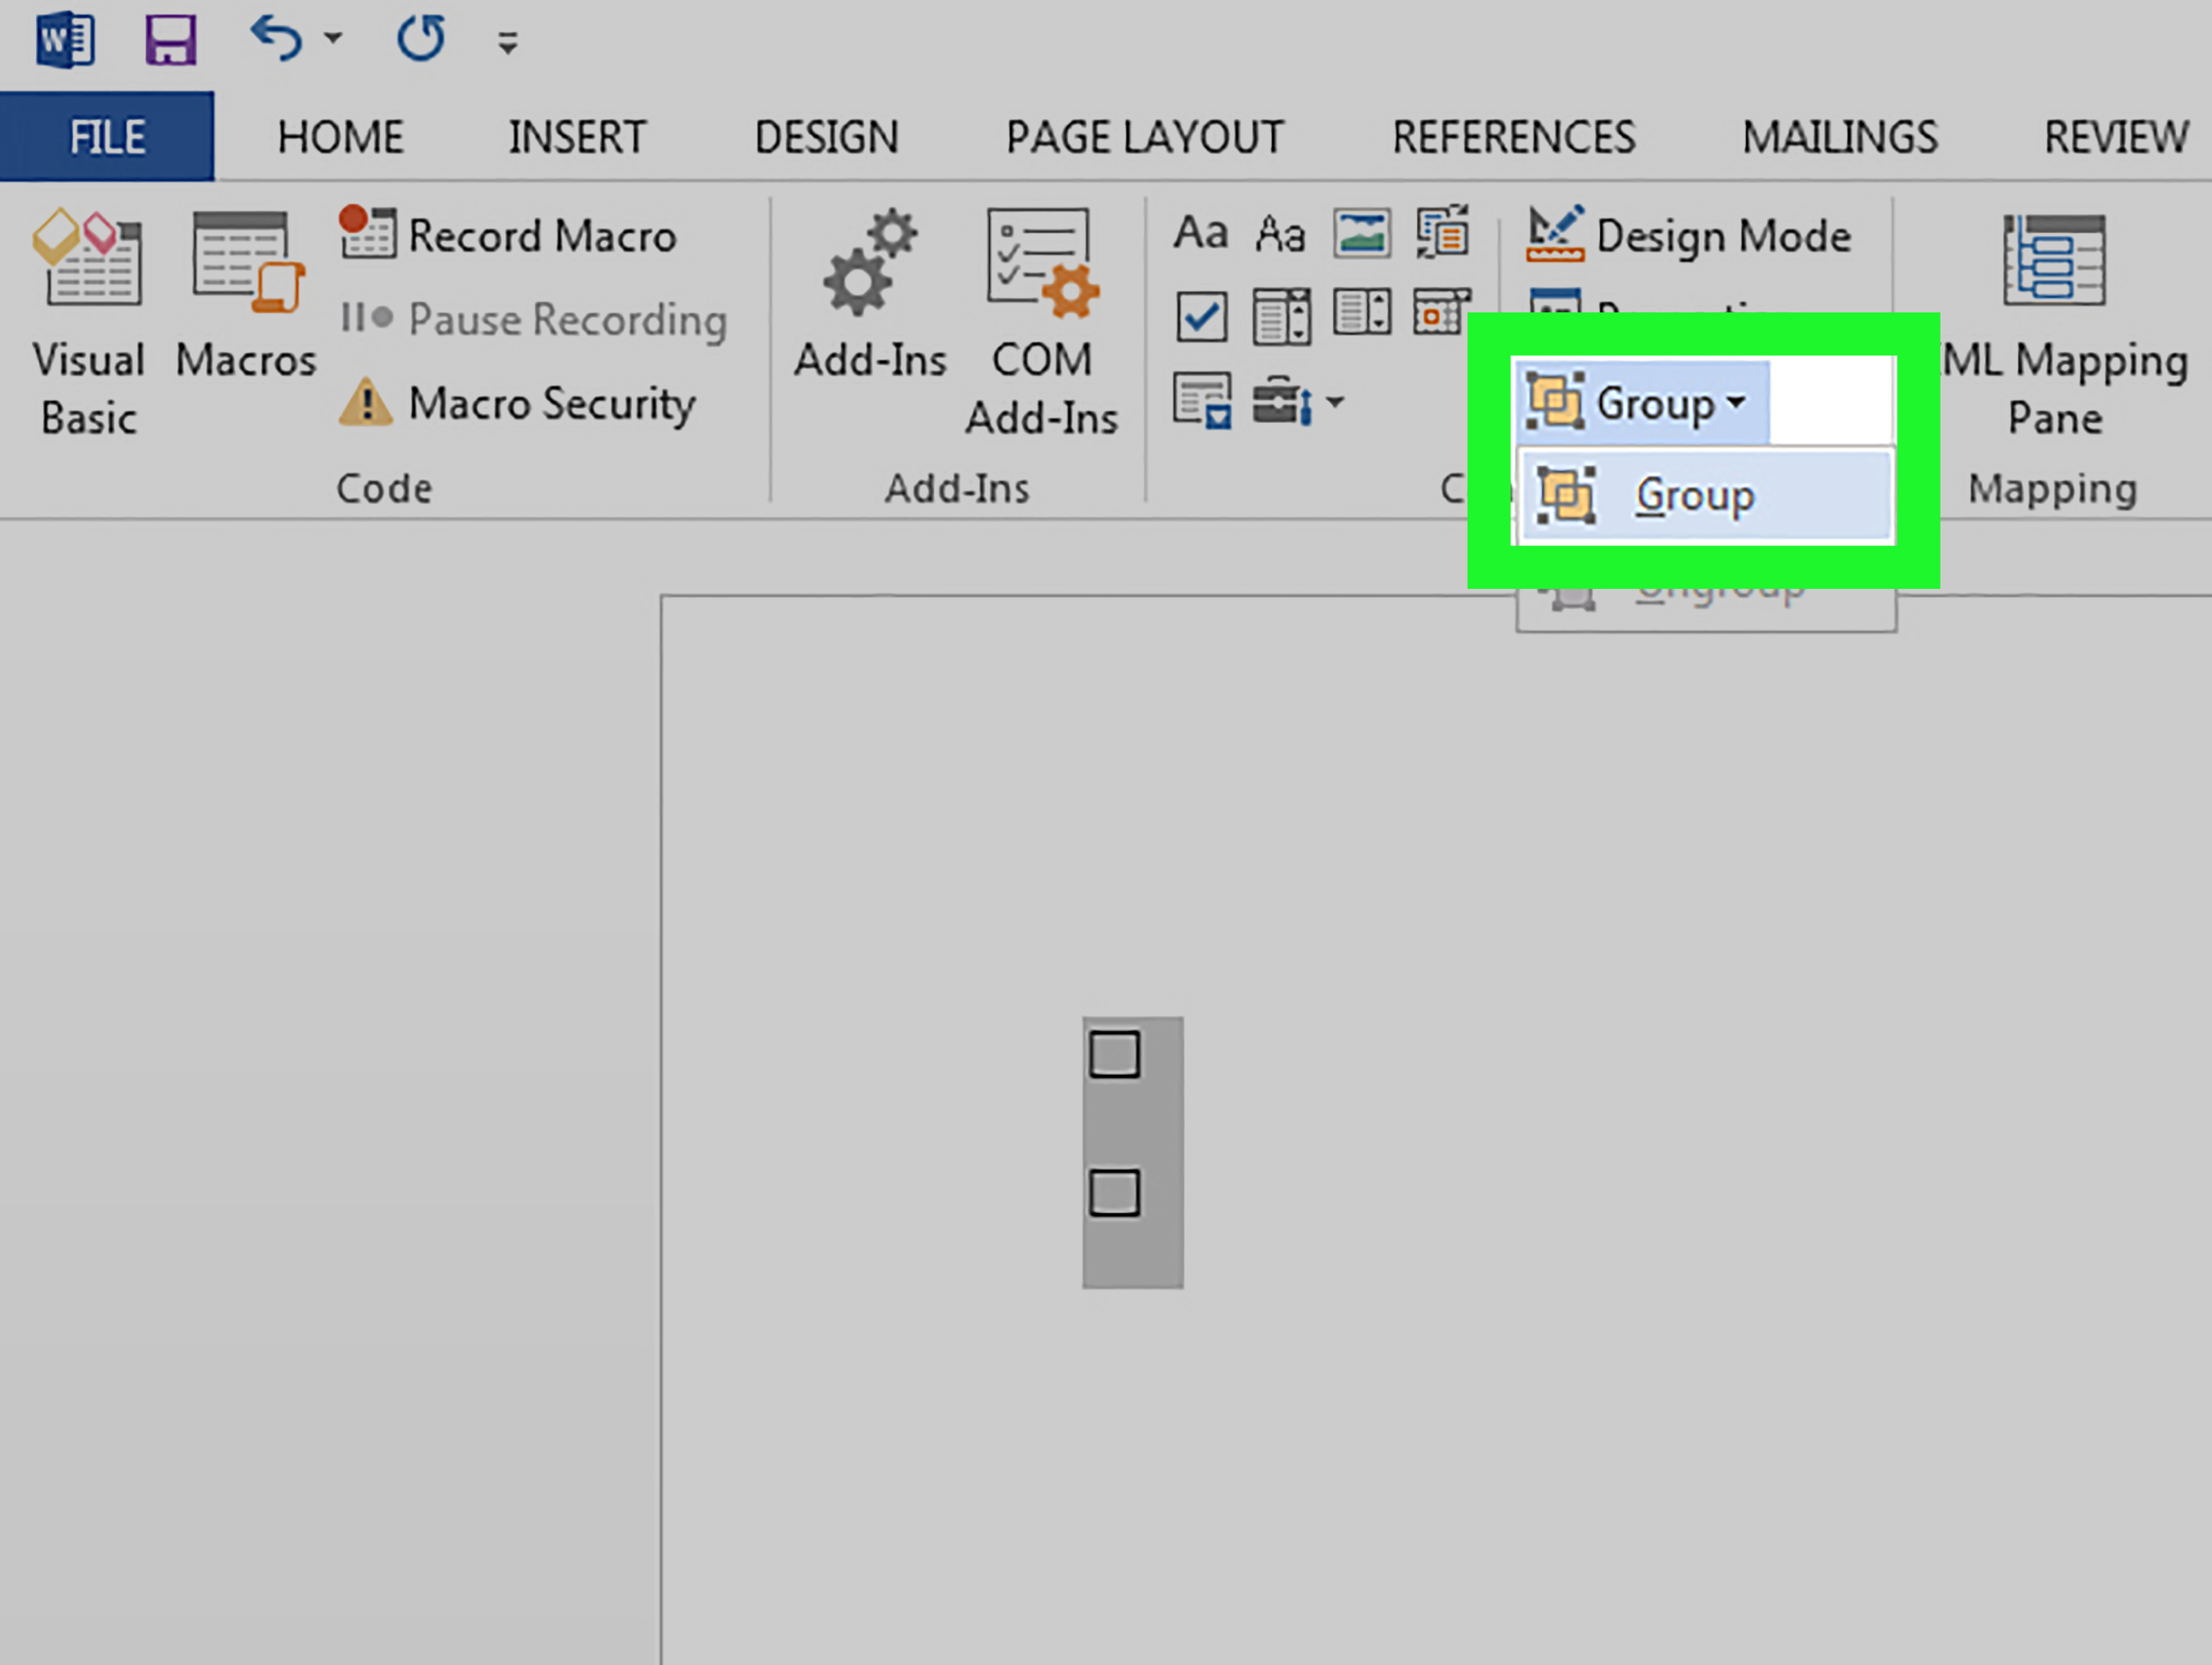
- In the Controls group, click the Check Box Content Control icon (a checkbox symbol).
- A clickable checkbox appears. Click to check or uncheck it.
Using Bullet Points (Symbol - Non-interactive)
- Place your cursor where you want the checkbox.
- Go to the Home tab.
- Click the Bullets dropdown arrow.
- Select Define New Bullet.
- Click Symbol.
- Choose a font like Wingdings 2.
- Select an empty box symbol (e.g., character code 163). Click OK twice.
Notes:
- The Developer tab method creates a clickable form field.
- The symbol method creates a static character that you cannot interact with.
- These steps apply to Word for Windows and macOS desktop versions.